 Tweet
Tweet
Richtee kinda promted this from his post the other night about the discussion on venison meat on a different thread. he brought up some factors which can possibly help lead to poor venison. he mentioned several things which i agree with 100 percent.
adrenalin, an animal charged up, whether scared from being jumped in an old fashioned deer drive, wounded and have to be trailed down, or even in milder instances just scenting man, if you watch a deer close and see it stamping its hooves it is nervous and the adrenalin is starting.
proper shot placement, a clean and efficient harvest.
proper care in the field, cleanliness, and cooling down asap.
and then there is the processing end...
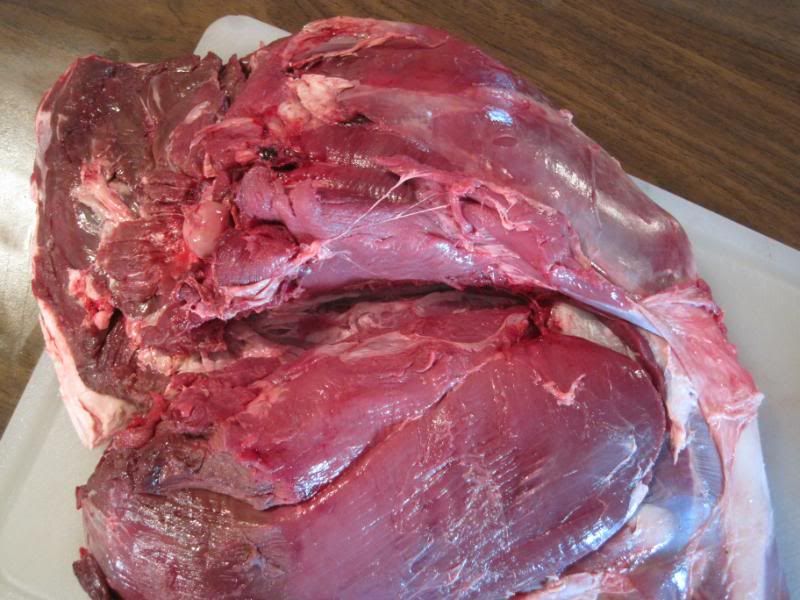
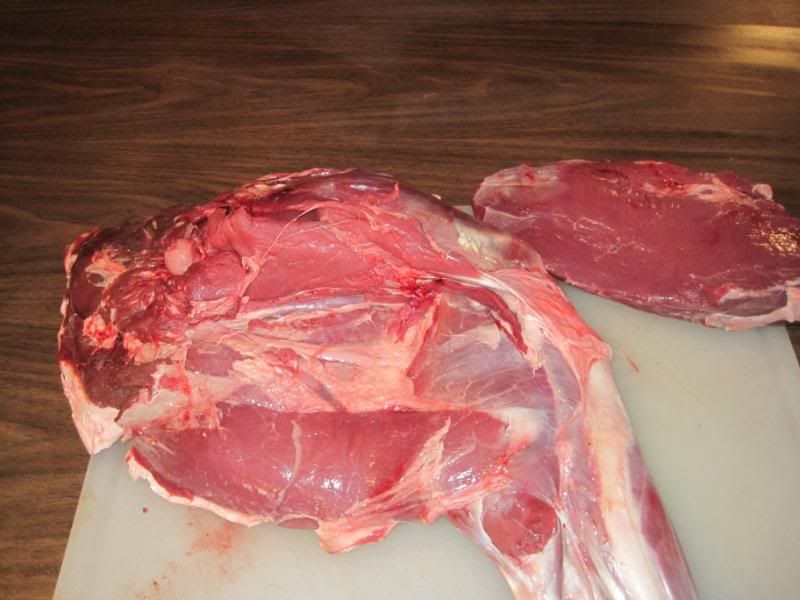
the rear quarter consists of 3 main muscles, top round, bottom round, sirloin tip. also included are the eye of round, and the rump or sirloin.
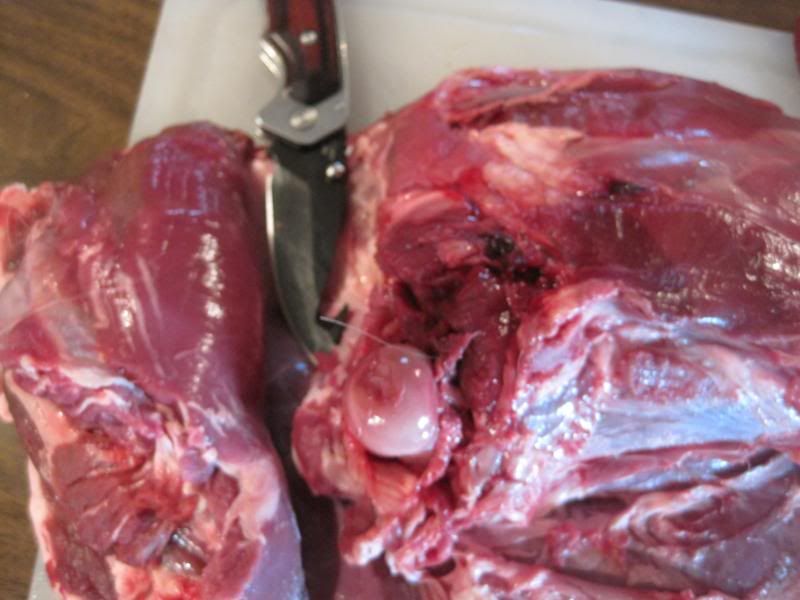
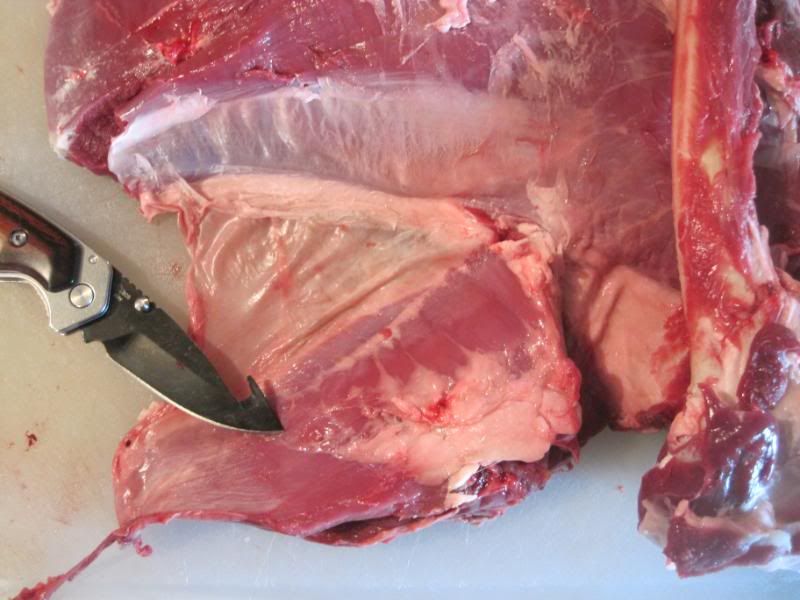
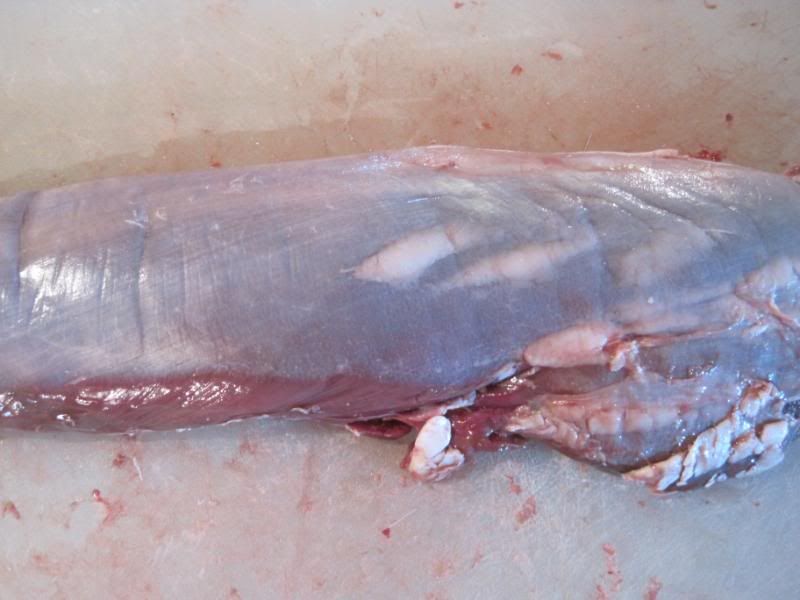
here is a deer hind quarter, inside part up.

these different muscles are all separate from each other, there are seams which run in between the individual muscles, can do most of the separation with your fingers, work them apart and in areas needed just drag the tip of your knife across the dividing membrane while rolling apart from the next muscle. this will give you the individual muscles which some are more tender than others. also the meat from the same muscle tends to cook the same compared to mixed muscle group cuts.
we are going to remove the top round first, is the tenderest portion of the quarter. here you can see we found the seam, there may be some membrane you may trim off first to get where i am at here. (the membrane is a good thing, acts as a barrier for dirt and hair, and also helps keep in moisture.
grabbing the top side and doing as much seperation as possible with fingers work the muscle away from the quarter. knife point is pasically for reference but there may be a couple small areas where just a drag of the knife is needed to keep the seperation going. use the knife as little as possible.
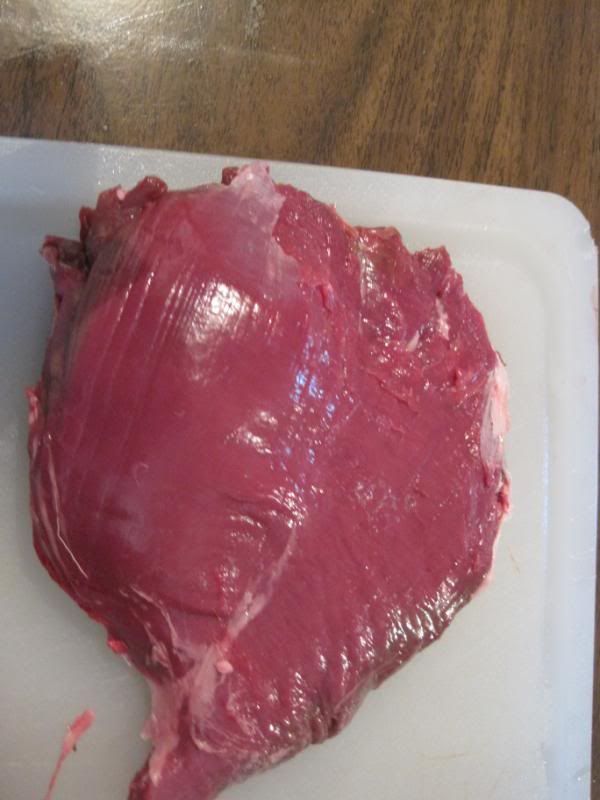
as you get to the joint area, there will be a little need for the knife here to cut the muscle loose from that area, pretty minimum though. here is the removed top round, i need to trim that bit of fat you see to the right side and some very minor trimming. all the bad stuff stays on the leg. here is a good time to start looking and seeing all the white chit in between the muscles, arterys and whatnot which are not the most desireable menu items eh...
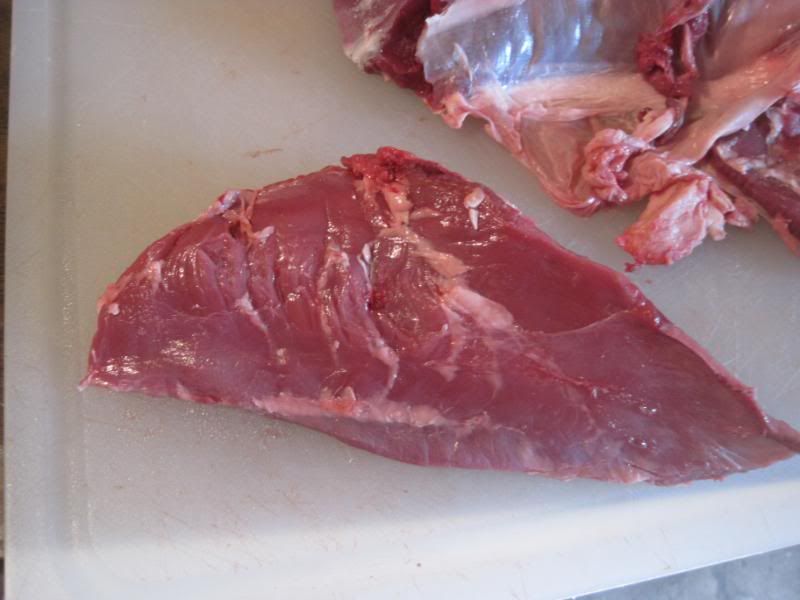
so now that top round is removed, we just follow the leg in natural progession of muscles to the underlying eye of round... this is a little tougher cut of the rear quarter, suitable for chunk stewmeat, roast, jerky, or just grind...

it kind of looks like a tenderloin dont it... again with fingers you can get it loose about 2/3's of the way, need to make a single cut on each end where it tapers down and attaches itself. the very back goes right up against the outer fat layer and carefully trim,and again using fingers as much as possible work it off the fat layer real nice and clean.
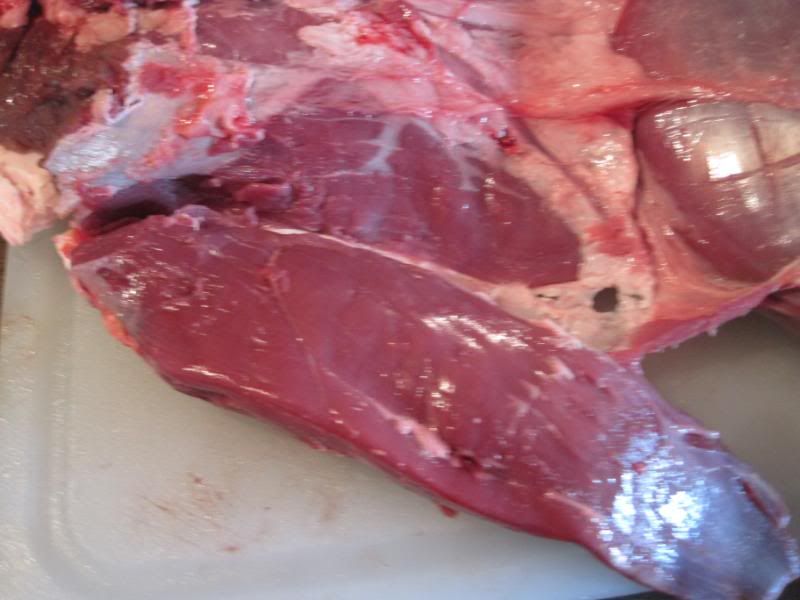
and here is the finished eye of round...
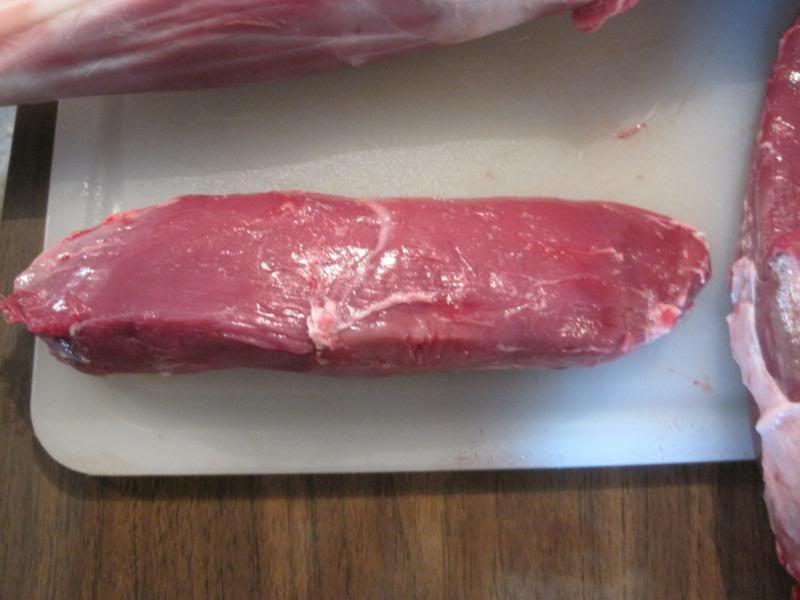
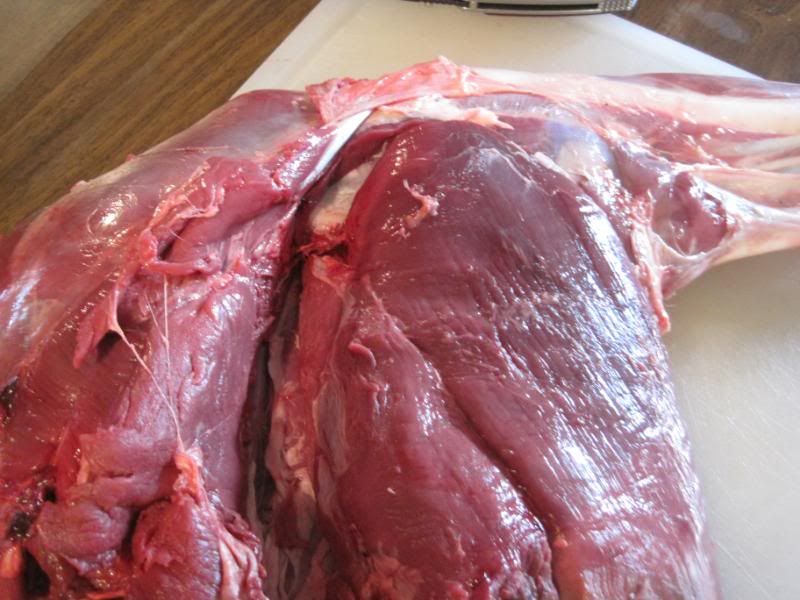
the next cut we go after is the sirloin or rump. this is a pretty nice cutlet of meat, is fairly tender and can be cubed an used for kabobs, cut into thick cutlets cross grain, butterflied and pounded out for chicken fried steak(one of my favorites...)sounds monotenous, but again using fingers, on the top side of the ball joint, find the seam and work the meat loose with fingers... by the way it comes apart real easy. the knife is just there as a reference point, to the right of the knife is the big part of the leg where the top and eye of rounds were removed. (theres a damn hair in me next 3 pics...)
and again with as little knife work as possible work the whole muscle loose.
and the finished removed cut, i trim the ragged edges etc. this piece is one worth saving. imho it goes like this... t-loin, backstrap, top round, rump, in order of tenderness.
moving on, and i kinda failed you all on the pics here, we are moving to the sirloin tip roast, rear quarter all pretty tender upper half but i am gonna go with this as being the least tender... jerky, roast to submission, guess you can split in half along the sinew that runs down the center and make some kind of cutlet, always the pound into chicken fried steak thing... or if you need the poundage for sausage this be the first cut from upper rear quarter that would hit my grinder...
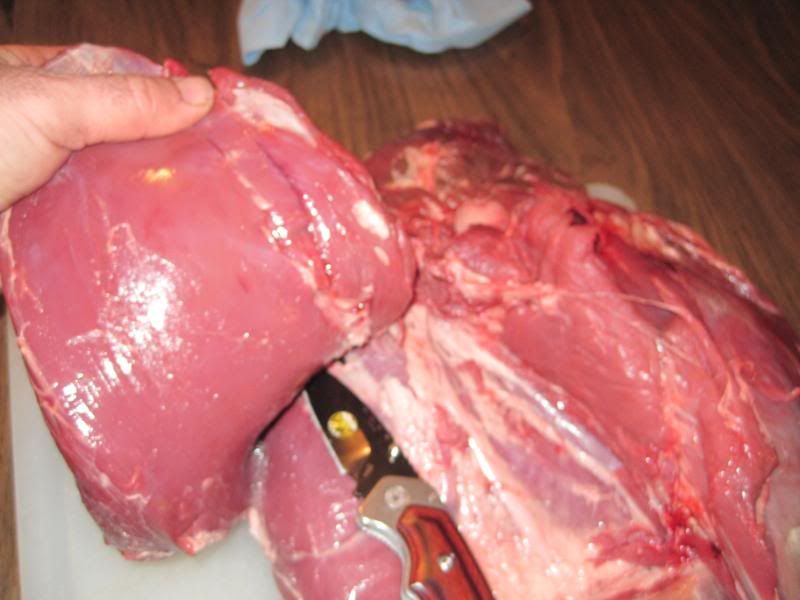
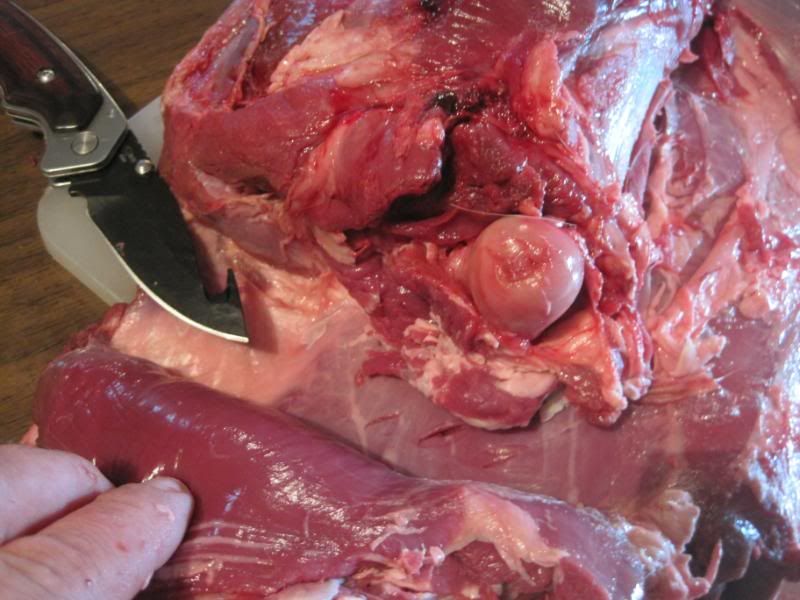
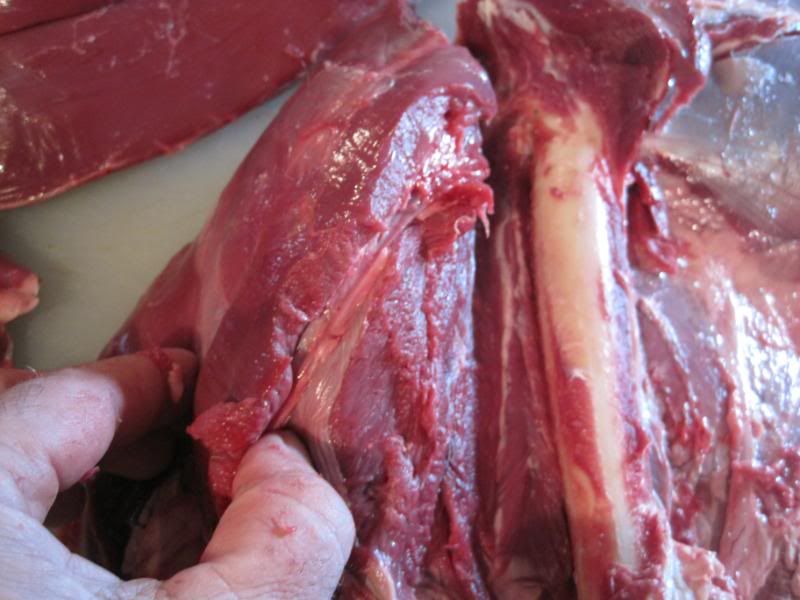
note, the venison ham is still laying on the same side it was when we first started this process... finding the muscle lump you would compare to your front thigh, trim the bone away from it as much as possible without getting into any of the remaining muscle group. trimming along this bone on this muscle is the only time you will not be following a seam to guide you.
so what you have left are two major muscles and some minors, the sirloin tip roast is kind of football shaped and is covered with a layer of thin muscle, this is the roast partially freed from the bone. the thin muscle covering it is kind of a flap. here i am holding the flap of covering tissue with my hand exposing the sirloin tip ball, trim that free, mostly finger work.
now for the first time flip the leg over. here is really where the pictures are missing but pretty easy to explain the gap. the two big muscles remaining attached, the sirloin tip(which is partially removed), and the bottom round, have a seam which runs between the two and is very visible. will see a white line, score this with your knife enought to get your fingers in and separate to the bone. finish trimming the sirloin tip loose from the bone and set aside...
did i say there was going to be a quiz??? west coasters, kelly, mikey, ddave what cut is the knife sorta pointing at??? by the way, the leg bone is 90 deg out of posistion, should rotate back ccw 1/4 turn and should be pointing at 3 o clock instead of 6...
it actually is in part of the flap which runs around the sirloin tip in prev step.
is pretty popular cut cept they in michigan...
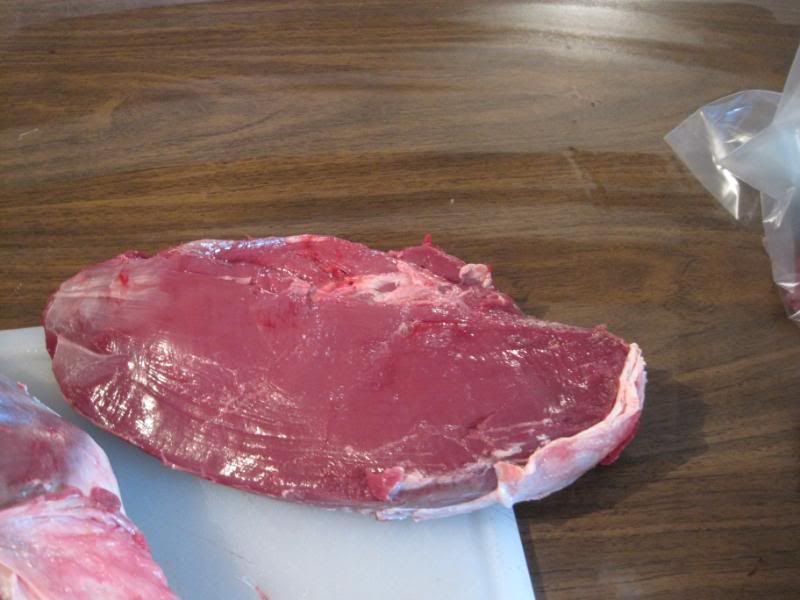
whatcha know, a venison tri tip... personally i have always ground em up in past but decided to save them this year and give a shot... future post. here is removed from its sheathing and kinda sorta trimmed.
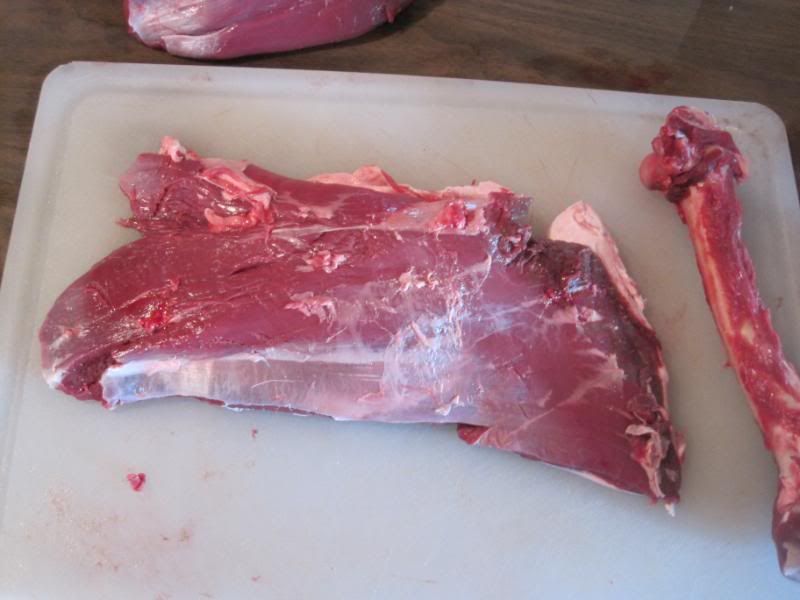
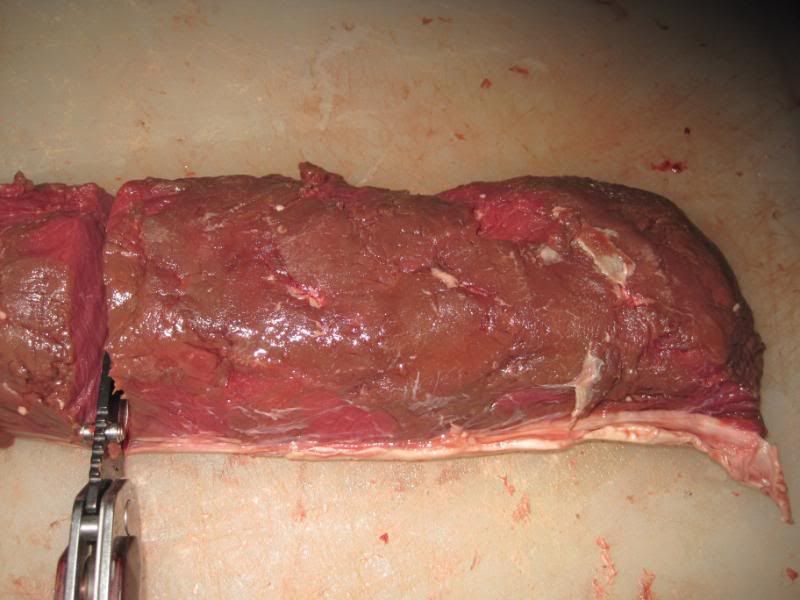
so what you have left is one roast which is the bottom round, i like to fillet it open, stuff roll back up and tie. has a big sinew running down one edge trim that off, the bottom side is right along the outer fat cap and does not have a seam in between the two so the fat needs to be carefully trimmed off. here is a pic of an untrimmed bottom round.
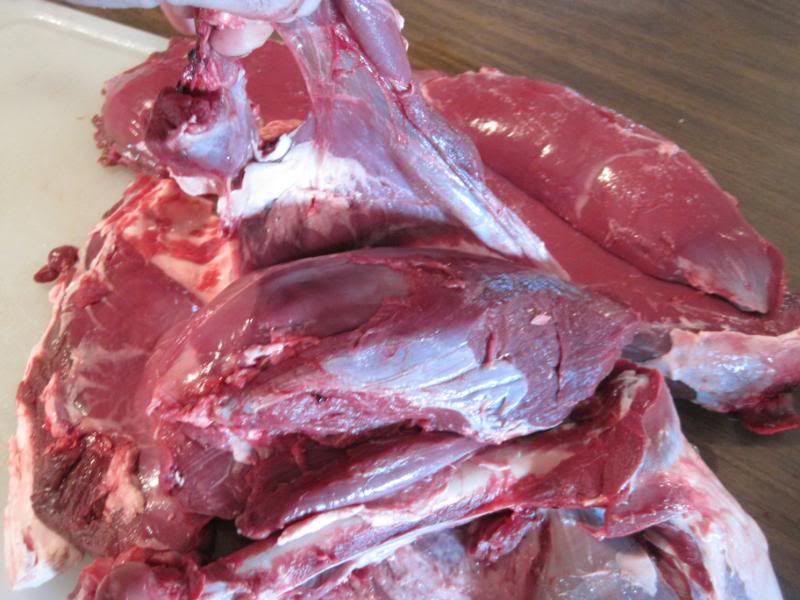
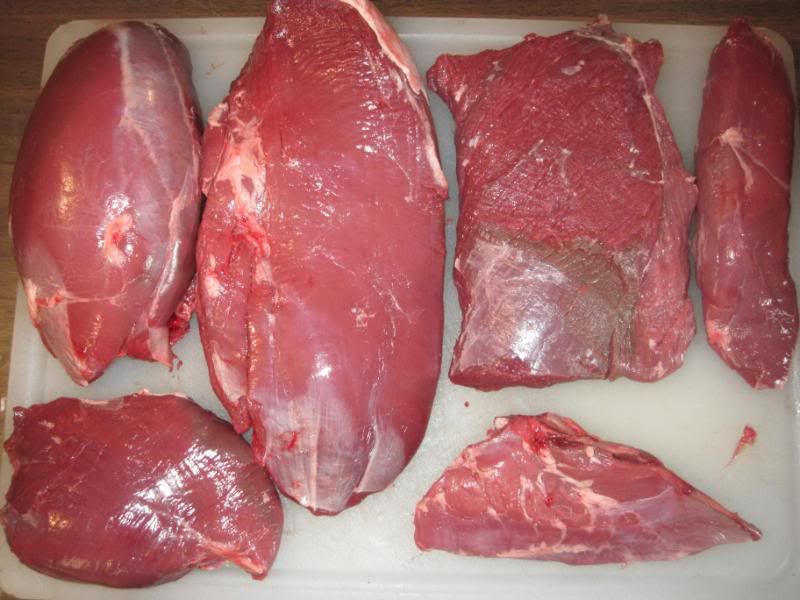
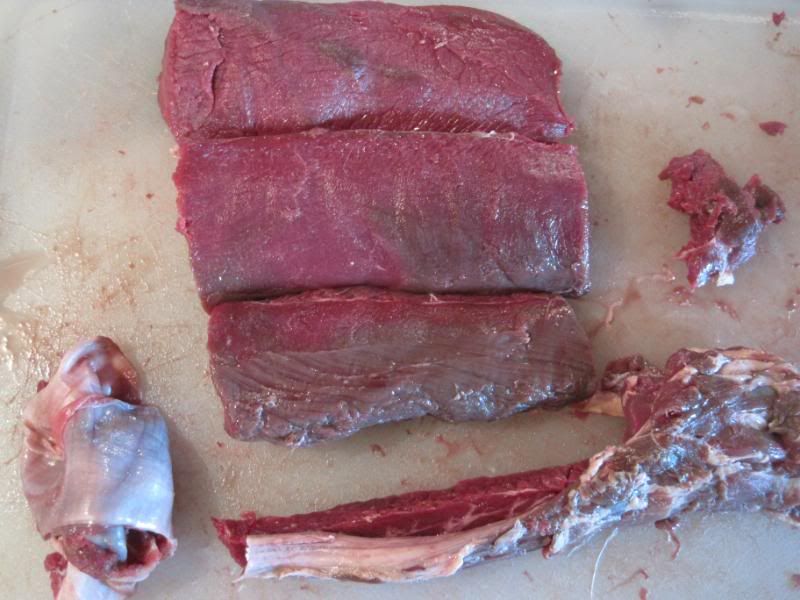
so here are the cuts from a rear quarter laid out, top row l to r...
sirloin tip, top round, bottom round(note i squared it off), eye of round.
bottom row l to r.
rump or top sirloin, and the tri tip.
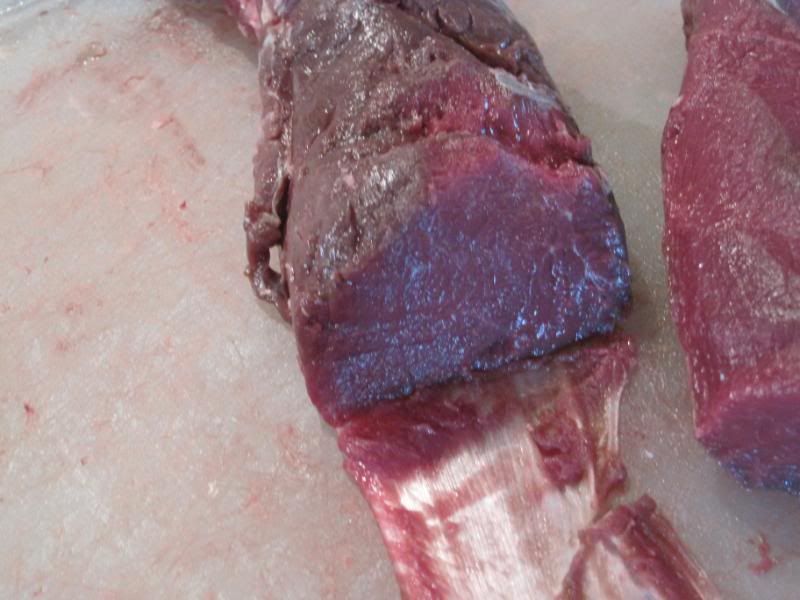
because i screwed up with lack of pics earlier have included bonus pics of trimming up a back strap... said backstrap or loin...
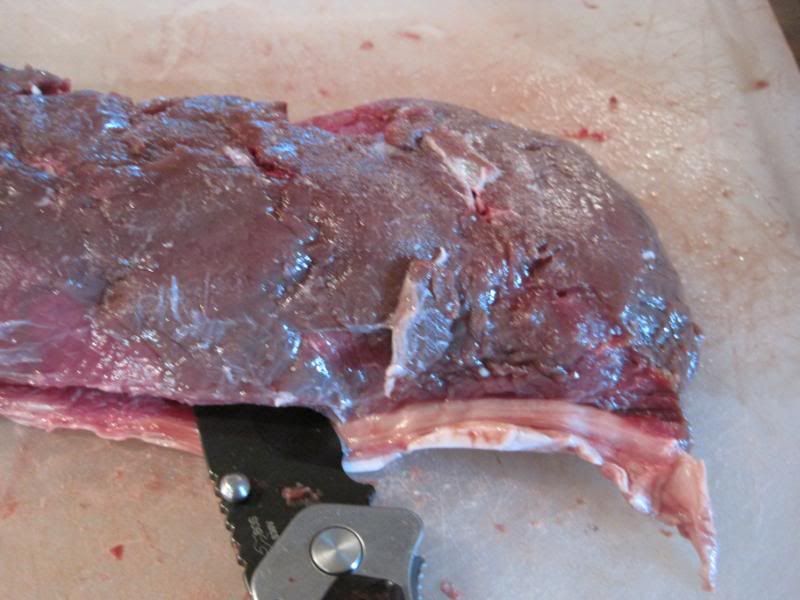
as i am vacupacking these and they are going to the deep freeze. i decide how big of chunk i want. i do not pre cut any steaks, final cutting will be done when pulled for use and thawed. cut down to silverskin and simply slide knife with blade angled down just like removing skin from a fish fillet.
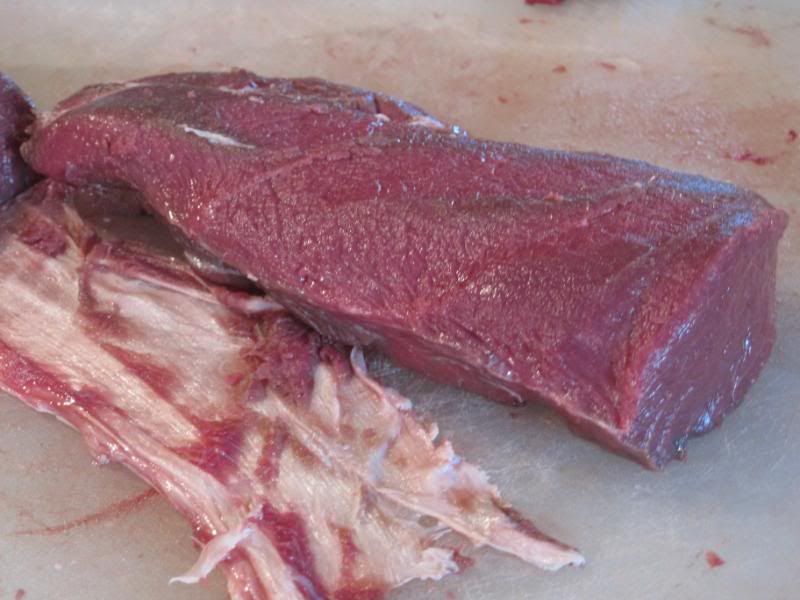
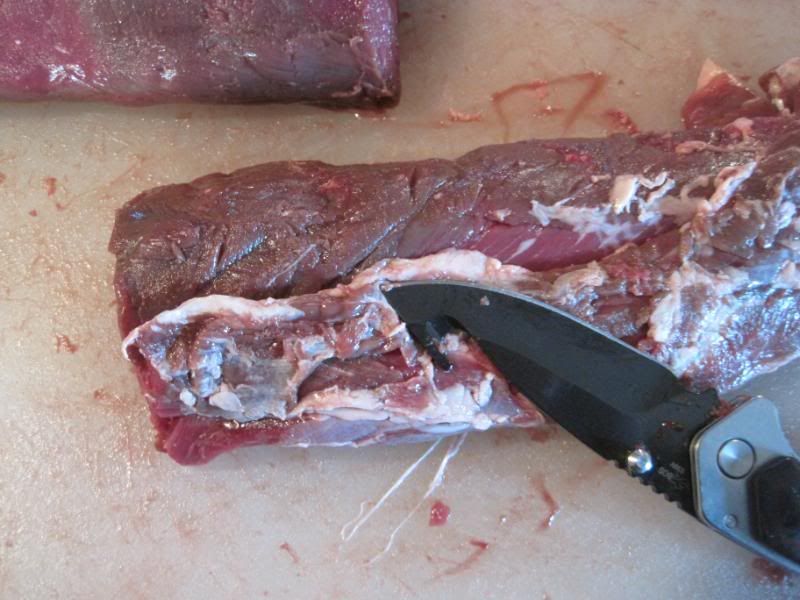
using the silver skin from area where chunk of meat just removed from as a handle, take knife and remove remaining back strap from silverskin.
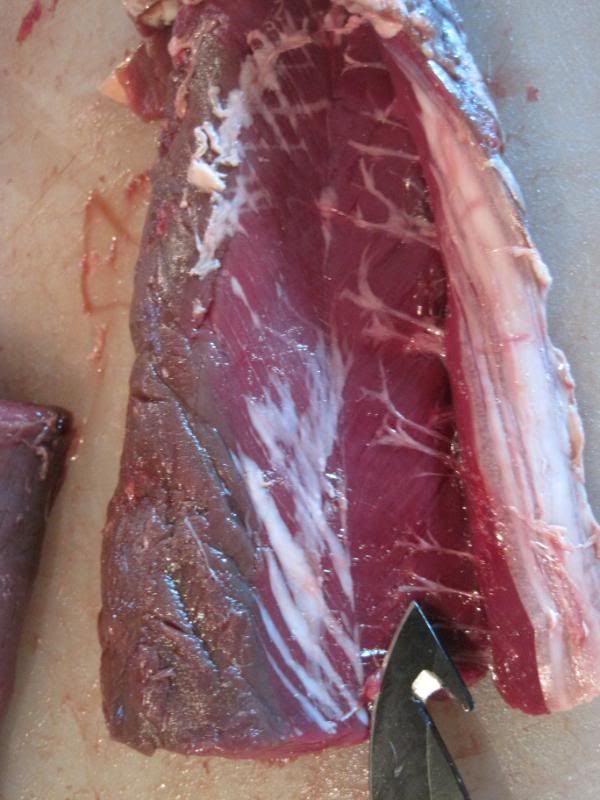
this is on shoulder end of backstrap, knife pointin out the separation between loin and misc muscle.
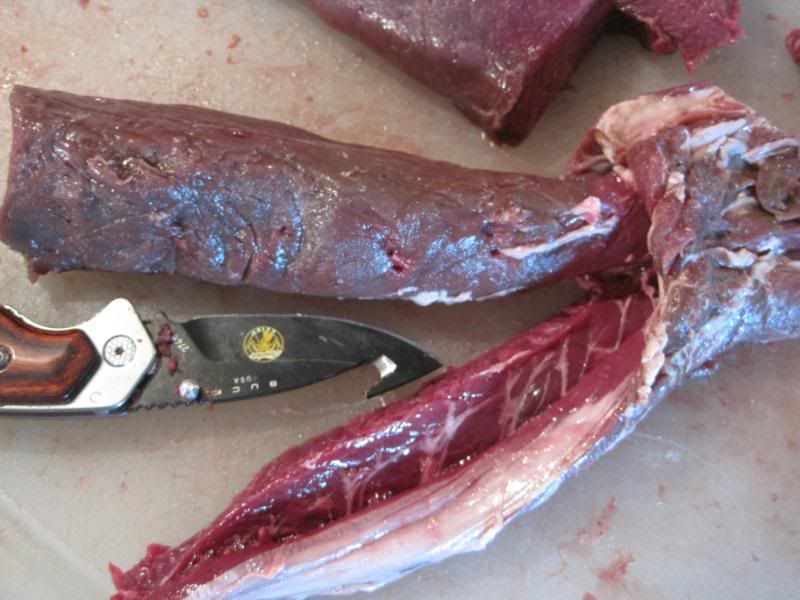
separate without knife.
trim forward end of strap free.
back strap ready for vacupacking and freezer.
i know this may seem like alot of time and work, but once you get the hang of it, you can do one a these quarters in 10 minutes easy(not incl trimming the shanks). but i am sure if one wanted to go for speed could do even faster...
tradiitionally we used to cut round steaks from the hams, so 4+ different muscles all in one steak, each having different cooking requirements. one piece of the steak nice and tender, the next shoe leather... not to mention when you cross cut a quarter all that nasty white crap you see in the first pictures between the muscles is still in there.
break them down like this and i dont see how you cannot enjoy your venison more. not to mention it is available for your use in which ever fashion you please. no limits...
thks for cking my thread and if any can even take a little bit from here and enjoy there wild game a little more it all worth it. and as sportspeople we owe that much to the animal... remember venison, its not just for sausage...
adrenalin, an animal charged up, whether scared from being jumped in an old fashioned deer drive, wounded and have to be trailed down, or even in milder instances just scenting man, if you watch a deer close and see it stamping its hooves it is nervous and the adrenalin is starting.
proper shot placement, a clean and efficient harvest.
proper care in the field, cleanliness, and cooling down asap.
and then there is the processing end...
the rear quarter consists of 3 main muscles, top round, bottom round, sirloin tip. also included are the eye of round, and the rump or sirloin.
here is a deer hind quarter, inside part up.
these different muscles are all separate from each other, there are seams which run in between the individual muscles, can do most of the separation with your fingers, work them apart and in areas needed just drag the tip of your knife across the dividing membrane while rolling apart from the next muscle. this will give you the individual muscles which some are more tender than others. also the meat from the same muscle tends to cook the same compared to mixed muscle group cuts.
we are going to remove the top round first, is the tenderest portion of the quarter. here you can see we found the seam, there may be some membrane you may trim off first to get where i am at here. (the membrane is a good thing, acts as a barrier for dirt and hair, and also helps keep in moisture.
grabbing the top side and doing as much seperation as possible with fingers work the muscle away from the quarter. knife point is pasically for reference but there may be a couple small areas where just a drag of the knife is needed to keep the seperation going. use the knife as little as possible.
as you get to the joint area, there will be a little need for the knife here to cut the muscle loose from that area, pretty minimum though. here is the removed top round, i need to trim that bit of fat you see to the right side and some very minor trimming. all the bad stuff stays on the leg. here is a good time to start looking and seeing all the white chit in between the muscles, arterys and whatnot which are not the most desireable menu items eh...
so now that top round is removed, we just follow the leg in natural progession of muscles to the underlying eye of round... this is a little tougher cut of the rear quarter, suitable for chunk stewmeat, roast, jerky, or just grind...
it kind of looks like a tenderloin dont it... again with fingers you can get it loose about 2/3's of the way, need to make a single cut on each end where it tapers down and attaches itself. the very back goes right up against the outer fat layer and carefully trim,and again using fingers as much as possible work it off the fat layer real nice and clean.
and here is the finished eye of round...
the next cut we go after is the sirloin or rump. this is a pretty nice cutlet of meat, is fairly tender and can be cubed an used for kabobs, cut into thick cutlets cross grain, butterflied and pounded out for chicken fried steak(one of my favorites...)sounds monotenous, but again using fingers, on the top side of the ball joint, find the seam and work the meat loose with fingers... by the way it comes apart real easy. the knife is just there as a reference point, to the right of the knife is the big part of the leg where the top and eye of rounds were removed. (theres a damn hair in me next 3 pics...)
and again with as little knife work as possible work the whole muscle loose.
and the finished removed cut, i trim the ragged edges etc. this piece is one worth saving. imho it goes like this... t-loin, backstrap, top round, rump, in order of tenderness.
moving on, and i kinda failed you all on the pics here, we are moving to the sirloin tip roast, rear quarter all pretty tender upper half but i am gonna go with this as being the least tender... jerky, roast to submission, guess you can split in half along the sinew that runs down the center and make some kind of cutlet, always the pound into chicken fried steak thing... or if you need the poundage for sausage this be the first cut from upper rear quarter that would hit my grinder...
note, the venison ham is still laying on the same side it was when we first started this process... finding the muscle lump you would compare to your front thigh, trim the bone away from it as much as possible without getting into any of the remaining muscle group. trimming along this bone on this muscle is the only time you will not be following a seam to guide you.
so what you have left are two major muscles and some minors, the sirloin tip roast is kind of football shaped and is covered with a layer of thin muscle, this is the roast partially freed from the bone. the thin muscle covering it is kind of a flap. here i am holding the flap of covering tissue with my hand exposing the sirloin tip ball, trim that free, mostly finger work.
now for the first time flip the leg over. here is really where the pictures are missing but pretty easy to explain the gap. the two big muscles remaining attached, the sirloin tip(which is partially removed), and the bottom round, have a seam which runs between the two and is very visible. will see a white line, score this with your knife enought to get your fingers in and separate to the bone. finish trimming the sirloin tip loose from the bone and set aside...
did i say there was going to be a quiz??? west coasters, kelly, mikey, ddave what cut is the knife sorta pointing at??? by the way, the leg bone is 90 deg out of posistion, should rotate back ccw 1/4 turn and should be pointing at 3 o clock instead of 6...
it actually is in part of the flap which runs around the sirloin tip in prev step.
is pretty popular cut cept they in michigan...
whatcha know, a venison tri tip... personally i have always ground em up in past but decided to save them this year and give a shot... future post. here is removed from its sheathing and kinda sorta trimmed.
so what you have left is one roast which is the bottom round, i like to fillet it open, stuff roll back up and tie. has a big sinew running down one edge trim that off, the bottom side is right along the outer fat cap and does not have a seam in between the two so the fat needs to be carefully trimmed off. here is a pic of an untrimmed bottom round.
so here are the cuts from a rear quarter laid out, top row l to r...
sirloin tip, top round, bottom round(note i squared it off), eye of round.
bottom row l to r.
rump or top sirloin, and the tri tip.
because i screwed up with lack of pics earlier have included bonus pics of trimming up a back strap... said backstrap or loin...
as i am vacupacking these and they are going to the deep freeze. i decide how big of chunk i want. i do not pre cut any steaks, final cutting will be done when pulled for use and thawed. cut down to silverskin and simply slide knife with blade angled down just like removing skin from a fish fillet.
using the silver skin from area where chunk of meat just removed from as a handle, take knife and remove remaining back strap from silverskin.
this is on shoulder end of backstrap, knife pointin out the separation between loin and misc muscle.
separate without knife.
trim forward end of strap free.
back strap ready for vacupacking and freezer.
i know this may seem like alot of time and work, but once you get the hang of it, you can do one a these quarters in 10 minutes easy(not incl trimming the shanks). but i am sure if one wanted to go for speed could do even faster...
tradiitionally we used to cut round steaks from the hams, so 4+ different muscles all in one steak, each having different cooking requirements. one piece of the steak nice and tender, the next shoe leather... not to mention when you cross cut a quarter all that nasty white crap you see in the first pictures between the muscles is still in there.
break them down like this and i dont see how you cannot enjoy your venison more. not to mention it is available for your use in which ever fashion you please. no limits...
thks for cking my thread and if any can even take a little bit from here and enjoy there wild game a little more it all worth it. and as sportspeople we owe that much to the animal... remember venison, its not just for sausage...


Comment