 Tweet
Tweet
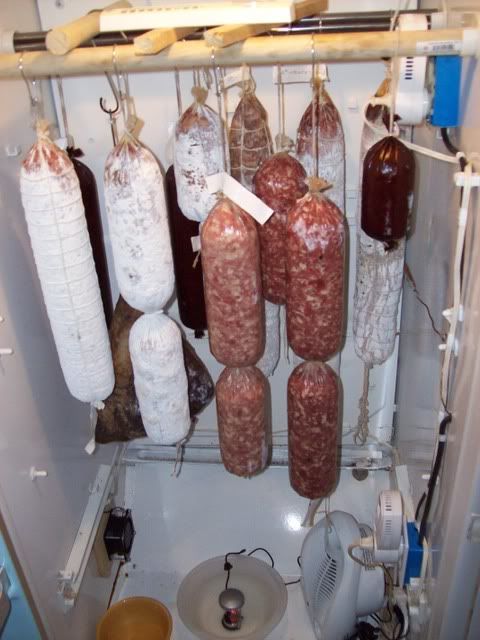
or The death of another freezer..
It’s a relatively simple conversion regulating all three of the variables, cooling, heating and humidity. Keep in mind my unit is held in a very dry area of my house and this conversion method was based on the units needs given the location.
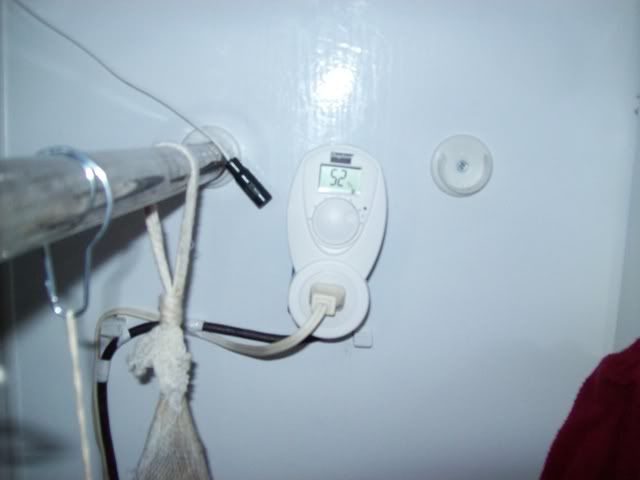
First I started with a working freezer. I installed a thermostat that would regulate the temperature from -30 to 90*F.

There are other types of temp controllers or you may find a thermostat with a narrower temp range which will also work fine. I set the thermostat to temp 57*F. If the temperature ever climbs to 60* or higher the freezer kicks on, chills the climate to 56 or 57*F and shuts off until it senses a higher temperature again. Should I need a warmer climate I have a variable temp. heater/fan situated inside the chamber as well.
I wired in a couple of outlets for the accessories. One outlet is set lower for the heater/fan and fogger and another higher up for the humidistat.
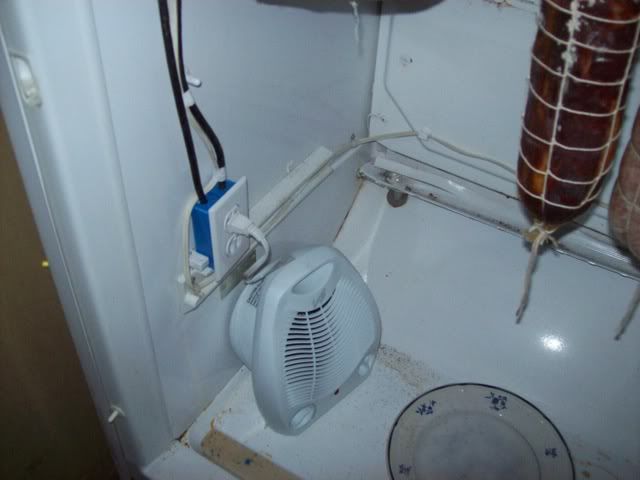
These two accessories, the fogger and the heater/fan, (using the “fan only” mode) are both plugged into the hygrostat via and ext. cord and will kick on when the RH falls below 65%. The fogger and the fan come on together and distribute the humidity uniformly throughout the chamber until the humidity reaches 72% then the hygrostat shuts off both the fan and the fogger. The humidity evens out to an average of 69-70% and the unit lays dormant until the next need is sensed.
Should the unit sense an excessive humidity level, the humidistat actuates a 3” 110v hobby fan that blows air out at the lower level ducted by a 3”I.D. piece of PVC pipe.
Installing the fan was just a matter of drilling the hole using a hole saw, mounting the fan on a mounting block and slipping the PVC into the drilled hole.

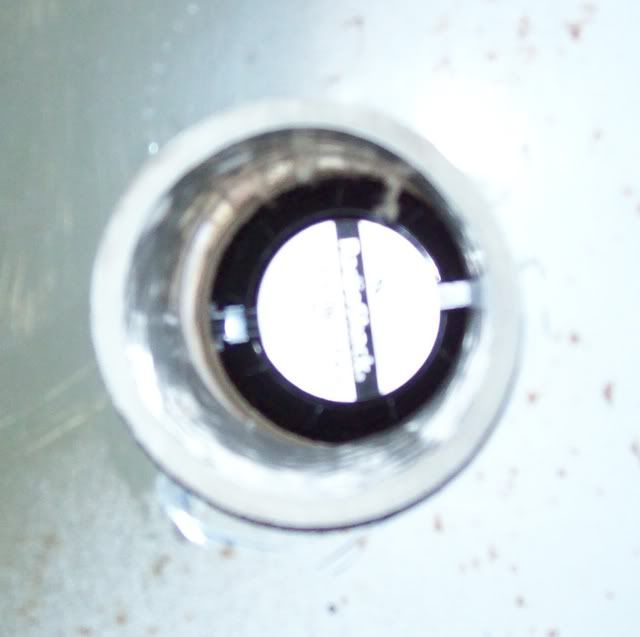
The dryer air is let in at the upper corner of the unit through several drilled holes.
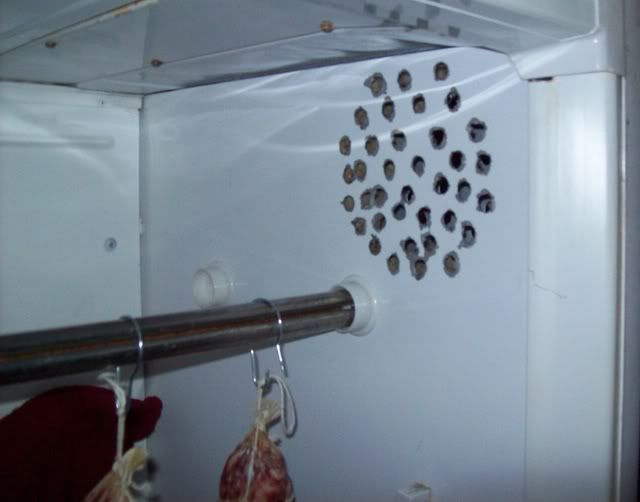
This venting seems to remove the humidity steadily in a more natural manner, however if the humidity becomes too excessive the fan kicks on pulling the dryer air in from the top and pushing the humid air out at the bottom.
Since I’ve employed this multi system approached my moulds have remained more positive with exception of a ham that’s been giving me a run for my money. I’ve attributed the greener mold that occurred on this project to the netting I used to hang the ham. After a good scrub, the ham was replaced without the netting and I haven’t noticed further occurrences.
In all, it seems a pretty dependable running unit needing very little assistance. I just water the bowl once a week or so, pay the light bill, and everything through proper adjustment seems to work fine.
I’m called away on work for extended periods, up to a week or more at a time so the unit has to operate totally on its own. It’s taken a little thought and time to get everything to operate as it does and there was a medium cost at about $170 - $200 to build but it seems to work fine now that it’s finished.
Thermo, hygro, and humidistat used were obtained from the following links:
http://www.grainger.com/Grainger/items/1RC43
http://www.grainger.com/Grainger/items/1UHG3
http://www.grainger.com/Grainger/items/1UHG2
My fogger came from this site:
http://www.bigappleherp.com/Big-Appl...=2&category=10
The 3” exhaust fan can be obtained from the following link:
http://www.radioshack.com/product/in...ductId=2103787
The variable temp heater/fan was purchased on sale at a home center.
The digital monitor I use was purchased from Extech.
http://www.grainger.com/Grainger/items/5PE71
It can be obtained at a more inexpensive price elsewhere, however I would suggest a medium level mechanical hygrometer. These can be purchased from around $10 - $100.00 depending on the quality you choose.
Many of these mechanical accessories can be found more inexpensively if you do a good search online for competitive prices.
It’s a relatively simple conversion regulating all three of the variables, cooling, heating and humidity. Keep in mind my unit is held in a very dry area of my house and this conversion method was based on the units needs given the location.
First I started with a working freezer. I installed a thermostat that would regulate the temperature from -30 to 90*F.
There are other types of temp controllers or you may find a thermostat with a narrower temp range which will also work fine. I set the thermostat to temp 57*F. If the temperature ever climbs to 60* or higher the freezer kicks on, chills the climate to 56 or 57*F and shuts off until it senses a higher temperature again. Should I need a warmer climate I have a variable temp. heater/fan situated inside the chamber as well.
I wired in a couple of outlets for the accessories. One outlet is set lower for the heater/fan and fogger and another higher up for the humidistat.
These two accessories, the fogger and the heater/fan, (using the “fan only” mode) are both plugged into the hygrostat via and ext. cord and will kick on when the RH falls below 65%. The fogger and the fan come on together and distribute the humidity uniformly throughout the chamber until the humidity reaches 72% then the hygrostat shuts off both the fan and the fogger. The humidity evens out to an average of 69-70% and the unit lays dormant until the next need is sensed.
Should the unit sense an excessive humidity level, the humidistat actuates a 3” 110v hobby fan that blows air out at the lower level ducted by a 3”I.D. piece of PVC pipe.
Installing the fan was just a matter of drilling the hole using a hole saw, mounting the fan on a mounting block and slipping the PVC into the drilled hole.
The dryer air is let in at the upper corner of the unit through several drilled holes.
This venting seems to remove the humidity steadily in a more natural manner, however if the humidity becomes too excessive the fan kicks on pulling the dryer air in from the top and pushing the humid air out at the bottom.
Since I’ve employed this multi system approached my moulds have remained more positive with exception of a ham that’s been giving me a run for my money. I’ve attributed the greener mold that occurred on this project to the netting I used to hang the ham. After a good scrub, the ham was replaced without the netting and I haven’t noticed further occurrences.
In all, it seems a pretty dependable running unit needing very little assistance. I just water the bowl once a week or so, pay the light bill, and everything through proper adjustment seems to work fine.
I’m called away on work for extended periods, up to a week or more at a time so the unit has to operate totally on its own. It’s taken a little thought and time to get everything to operate as it does and there was a medium cost at about $170 - $200 to build but it seems to work fine now that it’s finished.
Thermo, hygro, and humidistat used were obtained from the following links:
http://www.grainger.com/Grainger/items/1RC43
http://www.grainger.com/Grainger/items/1UHG3
http://www.grainger.com/Grainger/items/1UHG2
My fogger came from this site:
http://www.bigappleherp.com/Big-Appl...=2&category=10
The 3” exhaust fan can be obtained from the following link:
http://www.radioshack.com/product/in...ductId=2103787
The variable temp heater/fan was purchased on sale at a home center.
The digital monitor I use was purchased from Extech.
http://www.grainger.com/Grainger/items/5PE71
It can be obtained at a more inexpensive price elsewhere, however I would suggest a medium level mechanical hygrometer. These can be purchased from around $10 - $100.00 depending on the quality you choose.
Many of these mechanical accessories can be found more inexpensively if you do a good search online for competitive prices.


Comment