 Tweet
Tweet
As I stated in my intro posting, I found this forum due to HawgHeaven's Char Grill Pro Mods document. (Found at http://www.hhsbbq.com/CharGrillerMods.pdf)
For those that did not see that post, I was ready to get rid of my Char Griller Pro after struggling with it for 5+ years. I did a few of the cheap quick mods. After the vent tube, flipping the charcoal rack as a make shift baffle, and a better basket for the charcoal my next two smokes were fantastic.
So following the PDF that HawgHeaven so meticulously created I ventured out to other mods. So far I have the vent tube, the wheels and utility hooks done.
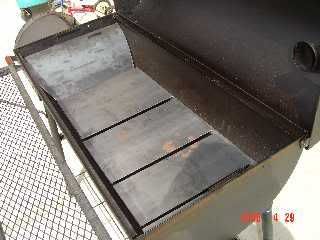
Oh the other mod I did today was the removal of a previous mod, I removed the rotisserie attachment, I realized the heat from the charcoal in the main chamber was ruining my seasoned innards and the paint on the bottom of the main chamber.
I have the hardware for a better charcoal basket, the baffle and tuning plates, and the dual 3in temp gauges. Will be looking into better handles soon. Will also plug the holes in the lid from the now removed rotisserie usage.
So first mod that I did the morning of Father's day, made a huge difference the lowering the vent tube.

Today I installed 10" inflatable tires as I keep the smoker in the yard and my lawn is far from level or smooth. The difference I made compared to the previously mention document is I used threaded rods for the axles, this eliminated the the need to drill holes for cotter pins if I had used a non threaded rod.

The last modification for today was the utility hooks, after always struggling with the lack of shelf space for any needed utensils on smoking day this was a no brainer that it was needed. I went ahead and did the hooks for both shelves.

Here is a shot of all the hooks and the wheels.

Up next will be digging into the innards and installing the rails for the tuning plates and installing the baffle, since this grill is used it's going to be messy.
Also wire brushing off any rust spots and giving fresh high temp pain coating on the exterior as I am working on it.
This has turned into a great project to work on with my 5-year-old, he loved helping out today, he installed all the hooks, and the wheels, with just a little tightening of the nuts and bolts by me.
For those that did not see that post, I was ready to get rid of my Char Griller Pro after struggling with it for 5+ years. I did a few of the cheap quick mods. After the vent tube, flipping the charcoal rack as a make shift baffle, and a better basket for the charcoal my next two smokes were fantastic.
So following the PDF that HawgHeaven so meticulously created I ventured out to other mods. So far I have the vent tube, the wheels and utility hooks done.
Oh the other mod I did today was the removal of a previous mod, I removed the rotisserie attachment, I realized the heat from the charcoal in the main chamber was ruining my seasoned innards and the paint on the bottom of the main chamber.
I have the hardware for a better charcoal basket, the baffle and tuning plates, and the dual 3in temp gauges. Will be looking into better handles soon. Will also plug the holes in the lid from the now removed rotisserie usage.
So first mod that I did the morning of Father's day, made a huge difference the lowering the vent tube.
Today I installed 10" inflatable tires as I keep the smoker in the yard and my lawn is far from level or smooth. The difference I made compared to the previously mention document is I used threaded rods for the axles, this eliminated the the need to drill holes for cotter pins if I had used a non threaded rod.
The last modification for today was the utility hooks, after always struggling with the lack of shelf space for any needed utensils on smoking day this was a no brainer that it was needed. I went ahead and did the hooks for both shelves.
Here is a shot of all the hooks and the wheels.
Up next will be digging into the innards and installing the rails for the tuning plates and installing the baffle, since this grill is used it's going to be messy.
Also wire brushing off any rust spots and giving fresh high temp pain coating on the exterior as I am working on it.
This has turned into a great project to work on with my 5-year-old, he loved helping out today, he installed all the hooks, and the wheels, with just a little tightening of the nuts and bolts by me.


 " --
" --
Comment